Humans are naturally drawn to visual content. In fact, it’s safe to say that we’re constantly bombarded with images. For ecommerce merchants, how can you ensure your ecommerce store stands out in this sea of visuals? The key lies in a practice often overlooked: visual optimization.
In this blog, we will delve into a specific aspect of visual optimization that many tend to get wrong – resizing. We’ll cover different resizing aspects, including its importance, how Shopify deals with image sizing, recommended best Shopify image file formats, and more.
Image Resizing Misconceptions: What Type of Resizing Do You Need?
Most people don’t know there are various ways to resize an image. Perhaps this is the most common thing we always clarify to our users. The point of misconception is due to how image sizes are measured.
Resizing an image is done differently based on how the image size is expressed. Hence causing the misunderstanding. So, before we delve deeper, it’s worth shedding some light on how images are expressed in the digital space.
- Image Dimensions: This refers to the individual color points a digital image is made of. The unit of measurement used in dimensions is pixels (px) and is expressed in terms of width and height. For example, Shopify has a limit of 4472 x 4472 pixels (px) for their product and collection images.
- File Size: Image file size refers to how much storage space the image occupies in your computer, cloud storage, or database. This is expressed in bytes (bytes, kilobytes, or megabytes). Normally, resizing the file size corresponds to speed. That is, you’d want it as small as possible but still provide high-quality images.
- Compression refers to how much information is preserved depending on the file type (or compression method) used. It can either be lossy (Jpeg, Webp, GIF) or lossness (PNG, Tiff, HEIC, Raw). Compression is connected to file size. Lossy images store less image information, resulting in smaller file sizes. Lossless images store more image information, giving it a bigger file size.
- Resolution: Often expressed in Dots per Inch (DPI) or Pixels per Inch (PPI). This refers to the ‘density of the pixels’. Higher DPI/PPI values mean higher resolution and vice versa. An image resolution is often used when deciding if the image is for printed or web/display purposes. The standard resolution for web images is 72DPI.
- Aspect Ratio: Images can also be resized based on aspect ratios, such as 1:1 (Square), 2:3 (Portrait), or 3:2 (Landscape). Resizing an image in terms of aspect ratio is normally done to achieve uniformity and alignment when dealing with web images.
Why is image resizing important for visual aesthetics?
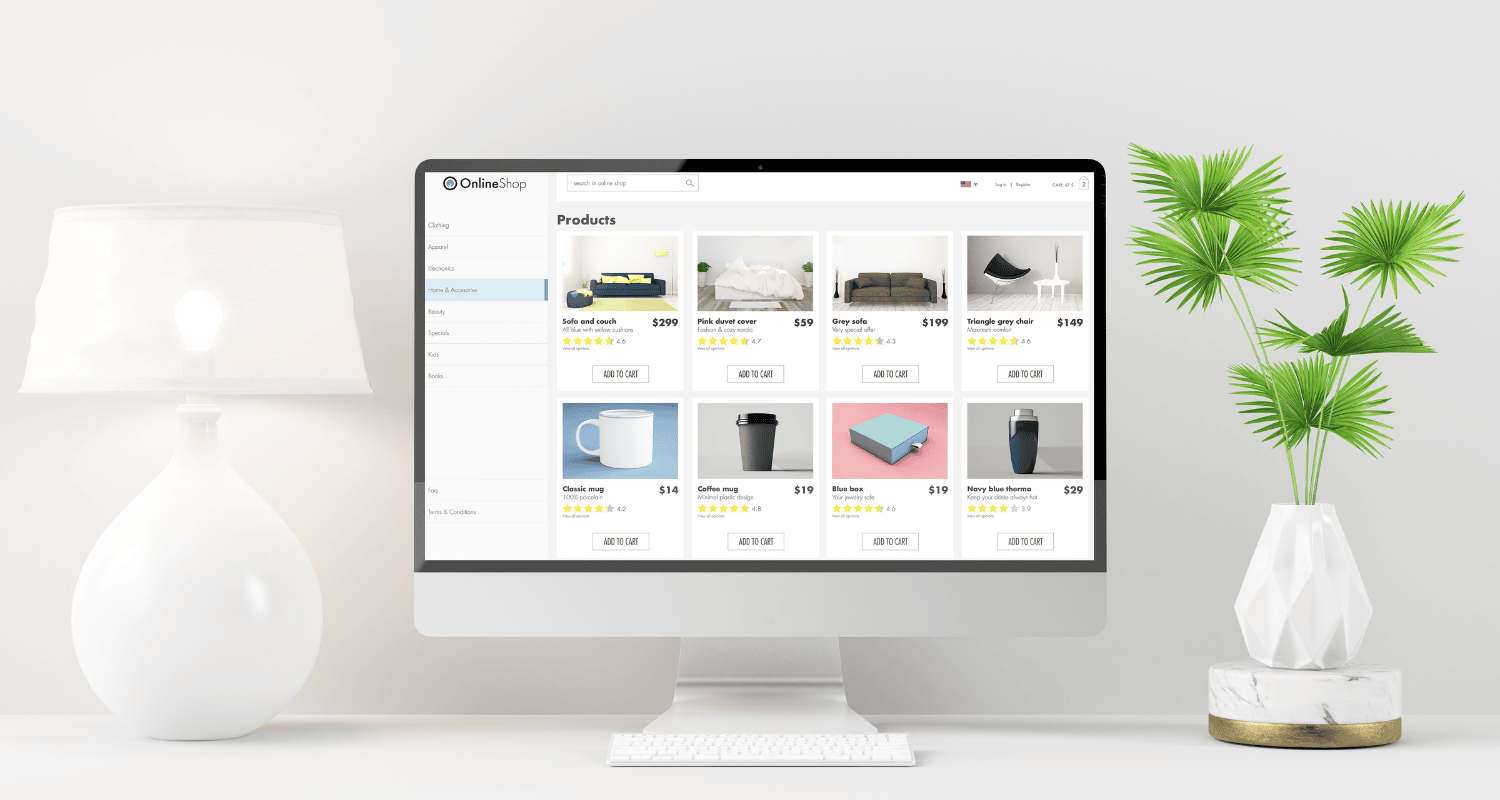
Think for a moment: How would a visitor react to images that are clearly inconsistent in size? It’s safe to say that it might be an immediate turn-off. It may come off as unprofessional, or your online store looks (excuse the term) cheap.
This is where properly resized images come into play. They’re not just about visual appeal but about cultivating a clean and polished website design.
By maintaining consistent image dimensions or aspect ratios, you can convey a sense of professionalism that resonates with your viewers. It’s all about making that crucial first impression and letting your audience know you take your business seriously.
Why is resizing images important for user experience (UX)?
User experience (UX) is about the feelings and impressions users get while interacting with your online store. Images also play a role in providing a good user experience, affecting your online store in different ways.
For one, image size can affect your store’s load speed. Visitors expect a webpage to load within 3 seconds. Anything longer than that can cause potential buyers to leave.
Images can also affect user experience based on how navigable your online store is, specifically your website’s layout and design. For instance, if your images are of varying sizes, it can cause inconsistent and broken layouts. Oversized images (in terms of dimensions) can also cause a distraction to your potential buyers, overshadowing important calls to action and preventing your buyers from purchasing.
Your goal is to ensure that your images are:
- File size: As small as possible while maintaining image quality
- Compression: Suitable for web viewing such as Webp or Jpeg
- Dimension: High enough that it maintains quality, but not too big that affects file size and not causing any distraction.
- Aspect ratio: Uniform and consistent aspect ratio to ensure a smooth and consistent layout.
Shopify Image Sizes Guidelines
Before you can even think about optimizing images for your Shopify store, you must adhere to Shopify’s guidelines and recommendations.
Here’s Shopify’s size guideline for different image types:
Background Image
- Max Image Width: 2500 pixels
- Max Image Height: 1406 pixels
- Aspect Ratio: 16:9
- File Size: Keep it under 20 MB
Hero Image
- Max Image Width: Between 1280 pixels and 2500 pixels
- Max Image Height: Between 720 pixels and 900 pixels
- Aspect Ratio: 16:9
- File Size: 10 MB or less
Remember, depending on your website’s design and goals, it’s often a choice between using a hero image or a background image, not both.
Blog Images
- Max Image Width: 2240 pixels
- Max Image Height: 1260 pixels
- Aspect Ratio: 16:9
- File Size: 3 MB or less
Logo
- Max Image width: 250 pixels
- Max Image height: 250 pixels
- Aspect ratio: 1:1, 2:3, 4:1
- File size: max of 1 MB
Many logos work best in a square format, offering a balanced and versatile appearance. If your logo has a more elongated or rectangular design, you can opt for a 2:3 image ratio to maintain an almost square look. This format provides more space for your logo’s elements to breathe.
Best Image File Formats for Shopify
Shopify supports the following image formats:
- JPEG
- Progressive JPEG
- PNG
- GIF
- HEIC
- WebP
- AVIF
Generally, without considering any specifics, we always recommend Jpeg or Webp image file formats for online stores. Both are lossy compression formats, translating to smaller file sizes suitable for load speed.
If you prefer your product images to have transparent backgrounds, go for Webp. Fortunately, this lossy file type supports transparency, making it a better choice than PNG.
How to effectively resize images without losing quality
Does image resizing lowers image quality? The short answer is it depends. Resizing images hinges on the outcome you want to achieve and how the images were resized. As explained earlier, resizing can come in different forms.
We’ll go over the top outcomes we normally get requests for and explain how to achieve high-quality images for your online store.
Enlarging really small images

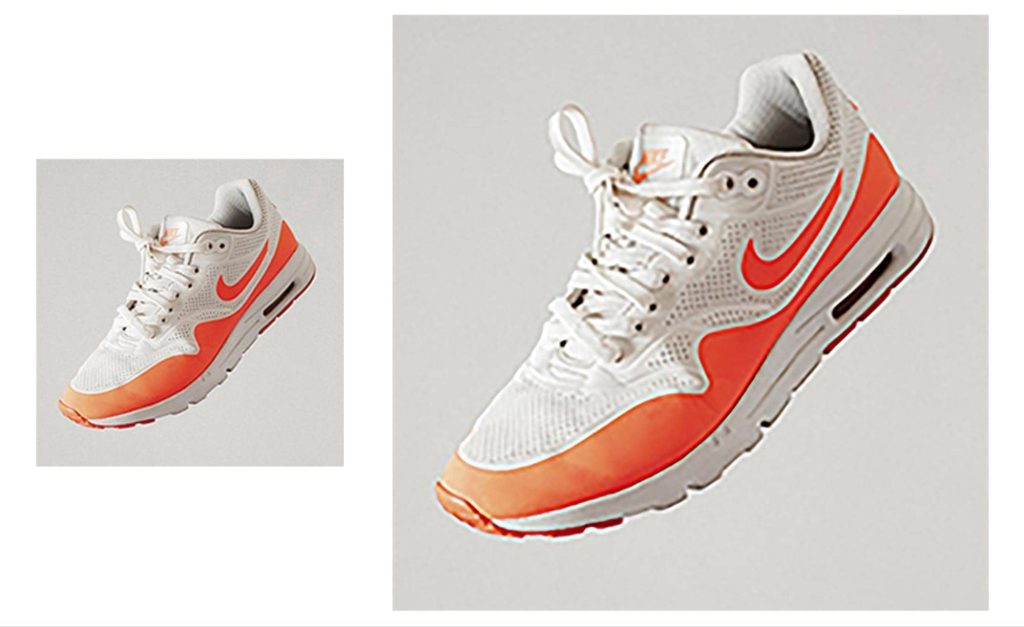
We normally encounter this problem with online stores dealing with supplier images. Sometimes, the supplier provides small, low-quality photos (see left-side photo above). The merchants will try to fix this by ‘enlarging’ the photos but getting a blurry, still low-quality image (see right-side photo above).
When enlarging an image 4-5x larger than its original dimension, the tool used to resize will try to ‘guess’ the new pixel values. This will lead to loss of detail, causing the image to become pixelated or blurry.
How to fix this?
- Retake the photo: If you have the resources, it’s better to retake the photos instead of forcing you to use your low-quality image for your online store. Not only will you get a unique image for your store, but you’ll get the quality you want.
- Use the right app: Traditional image editing tools offer the basic resizing tools you need. But they don’t have the tools to give you the upscaling you intend to happen. Fortunately, there are now apps (with the help of AI) that can upscale images and give you a higher quality than traditional resizing.
Resizing images’ aspect ratio to achieve uniformity
As described earlier, images of varying sizes can affect your store’s user experience. This is why we always recommend using the same aspect ratio for all product images. This is especially important when someone is viewing a category in your store.
How to fix this?
- Image Editing Tools: Most image editing tools allow you to resize images’ aspect ratio without an issue. You only need to decide on the aspect ratio and manually set it up. This is a cost-effective way of solving this problem. The downside is that it can be tedious if you’re resizing tons of images.
- Shopify Image Resizer Apps: An alternative solution to manually resizing the aspect ratio of your images is to use apps available in the market. Our Photo Resize App specifically handles this type of concern.
Compressing images for load speed
Loading speed is one of the most crucial factors that affect your online business. Since ecommerce stores are heavy in images, it’s vital that you use optimal images that don’t affect your site’s loading speed.
The key here is the file size. The recommended file size for standard product images is between 70KB to 150KB.
You need to keep your images’ file sizes to a minimum without affecting how your images look. But most merchants we handle often struggle with this. This is mainly because an image’s quality and file size are affected by its dimension and file format.
How to fix this?
- Choose the right file format: We always recommend choosing between Webp and Jpeg only for the file format. Either works best for ensuring good loading speed.
- Don’t fixate on dimension: Many online businesses we talk to often push for a minimum of 4,000 pixels (on the shortest side) because it’s Shopify’s recommended image size. But most people don’t know that resizing a photo from 4,000px to 1,200px will not make too much of a difference visually. But the 1,200px image will be smaller in file size compared to the 4,000px version.
Our Image Resizer Tool for Shopify Stores
Resizing images – as simple as it sounds – is still tedious and time-consuming for many merchants. We strongly believe that business owners should focus their time on handling other business aspects, such as growing your business.
This is the primary reason why we built the Photo Resize by Pixc. Our Shopify image resizer tool ensures that your images retain their aspect ratio, preventing any loss of quality. Our app also offers the convenience of batch-resizing all your product photos directly on your Shopify website in a few clicks.
Why do Shopify users love the Photo Resize App?
- Efficiently saves valuable time with the bulk image resizer.
- Automatically assesses, enhances, and updates product images.
- Creates a consistent look for all product photos, elevating the store’s professional appearance.
- Offers 3 aspect ratio options: square, portrait, and landscape.
- Allows you to revert to your original photos whenever needed, depending on your plan.
It’s a surefire way to achieve visual optimization and consistency of your Shopify store, overall, helping to improve user experience and conversions.
How to use our Shopify Image Resizer
We built the Photo Resize app to make it very simple for you. In a few simple steps, you’ll get all the images (or images you choose) resized and uniform in aspect ratio.
The app will resize your product photos by adding spaces (white background by default) around your images to make them whatever ratio you chose and automatically replace them on your Shopify website.

Here’s how the app works:
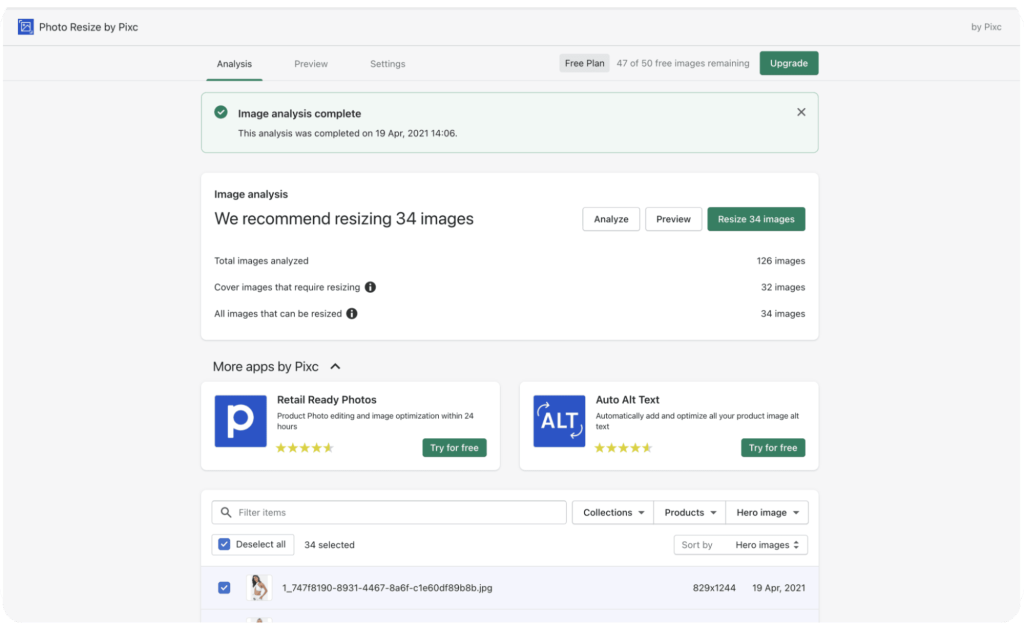
- Image Analysis: Upon installing the app, you’ll only see one button to analyze your store. This step will allow the app to check your images’ sizes, so we recommend which images require resizing.
- Select Images to Resize: By default, we’ll check images that are non-square (1:1 aspect ratio). After the analysis is done, you’ll see the number of images requiring resizing. From here, you can choose to resize all images or select images only. You can also use the filter to easily choose images to resize.
- Choose Plan: First-time users of the app will get 50 free images to resize. After selecting the photos to resize, you’ll be redirected to the pricing page, where you can choose to resize your 50 free images only or choose from any of our plans.
- Update Your Store: After the previous step, the app will now proceed with resizing and automatically update the images on your online store. That’s it!
Additional Benefits of the Photo Resize by Pixc app:
- Run on the background: Depending on the plan you have, you can set the app to run on the background so the app automatically resizes and replaces newly uploaded photos on your Shopify store. So, you no longer have to open the app moving forward. All done automatically!
- Set Maximum Dimension: Our app also allows you to set a maximum dimension for your images, helping you ensure your images are suitable for loading speed. For example, if your images are 5,000px minimum, you can set the app to resize the images maximum of 1,200px. Every time we resize your images, the maximum dimension (on the shortest side of the image) will be 1,200px only.
- Choose Color Background: By default, we add white spaces to the shortest side of your images to resize them to the same chosen aspect ratio. If you’re using a different background color for your store or product photos, you may set the app to match the color you use. Making your store more uniform and looking professional.
- Restore Your Original Images: If by any chance you need to revert the changes we made, you can restore your images’ original state through our restore feature.
Takeaway
In summary, we know that image resizing is a crucial process of ensuring your online store’s appearance and user experience.
We know there are a lot of misconceptions revolving around image resizing, and our aim is to clarify this, hoping to help any merchant struggling with a tedious task.
While resizing can be a delicate task with potential quality implications, you can simplify the process and ensure top-notch results by utilizing effective tools like Pixc’s Photo Resize App for Shopify.
Learn more about our Photo Resize App and try it for free today.
Toni-Ann Phillips
